Exchange Server Disaster Recovery Plan – Step by Step using DAG

Published: November 23rd, 2021 • 5 Minutes Reading
Exchange Database (EDB) files contain a large amount of important mailbox data. It contains multiple databases, company records, and categorized data that are essential to the smooth running of your organization. If it is lost or damaged due to physical or logical damage, it can be very dangerous.
Therefore, you should implement a Exchange Server Disaster Recovery Plan for Microsoft Exchange Server 2019, 2016, 2013, 2010 and below. This will prevent the loss of important information and will keep you communicating in the event of some problems. In this post, you can learn about different ways to recover data from EDB files.
Use a Perfect Software for Exchange EDB File Recovery
In the event of a disaster, an entire organization can collapse if not properly planned. There are ways to repair and extract data from EDB files using reliable tools. It is professional software designed to remove errors / corruption / damage / infections from priv.edb, pub.edb and STM files.
One such solution is the Exchange EDB Recovery Tool. Recover all data from Exchange Mailbox in healthy format. Also, the solution available to Recover Archived Emails in Exchange Server. It works on Windows Server 2016, 2012 R2, 2008. It even supports Windows OS 10, 8, 7 (32 bit or 64 bit).
Exchange Server Disaster Recovery Plan – Overview
In earlier versions of Exchange 2003, only one copy of EDB was stored with the full mailbox data. If for some reason it was damaged or corrupted, there was no way to access the user’s email. In 2007, a new Exchange disaster recovery plan was designed. This was called Cluster Continuous Replication (CCR). This allows the organization to store a copy of the EDB on the secondary system. In case of damage, the second EDB is designed to be active in a period of time of 1-2 minutes.
Support for Windows Server 2008 failover clustering has improved Exchange 2007 disaster recovery. You can now place your standby system in different geographic locations. This means that if a computer in New Jersey is flooded, the New Jersey System will fill that spot in a minute or two.
In the 2007 SP1 version, Standby Continuous Replication (SCR) was introduced. This allowed for a third copy that could be stored elsewhere for Exchange disaster recovery only. This meant that he had three copies of the same database, one active, one passive, and the third for recovery. This was very resource-intensive as the secondary system would only be up in the event of a failure.
That’s why we connected to the Exchange 2010, 2013, 2016, 2019 disaster recovery site using DAG. Also known as a Database Availability Group, it allows up to 16 copies of EDB files. Based on this, different sites have different database copies. Therefore, in case of failure, the backup system can be activated in 30-60 seconds. Each site had a passive database and an active database for storage and retrieval purposes.
Microsoft Exchange Server Disaster Recovery Plan Steps
The following is a step-by-step guide to setting up and configuring a recovery plan on Exchange Server.
Step 1: Create a Database Availability Group (DAG)
- First, install Exchange 2010, 2013, 2016, 2019 on Windows Server 2008 SP2 or higher version with Mailbox Server role
- Then, open the Exchange Management Console and go to Organization Configuration >> Mailbox >> Database Availability Group tab for Exchange disaster recovery
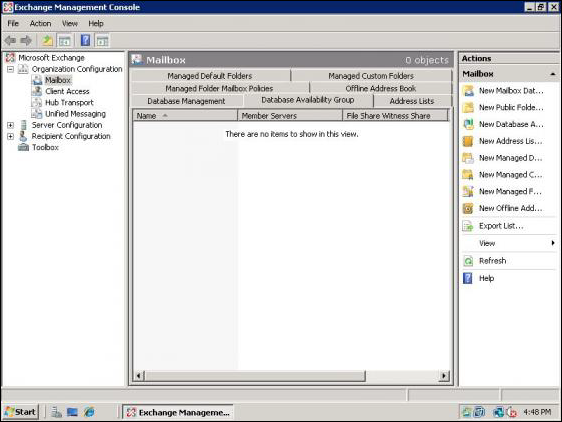
- From the right pane, click on ‘New Database Availability Group‘ option
- From the screen that opens, type in a name for DAG and set a witness path and directory
- Then, click on New button for disaster recovery in Exchange 2010, 2013, 2016, 2019
- After the wizard completes, click on Finish button.
Step 2: Add Members to Mailbox Servers
- Again, go to Exchange Management Console >> Organization Configuration >> Mailbox >> Database Availability Group tab
- Now, right-click on the DAG created in the previous step to perform Microsoft Exchange Server Disaster Recovery
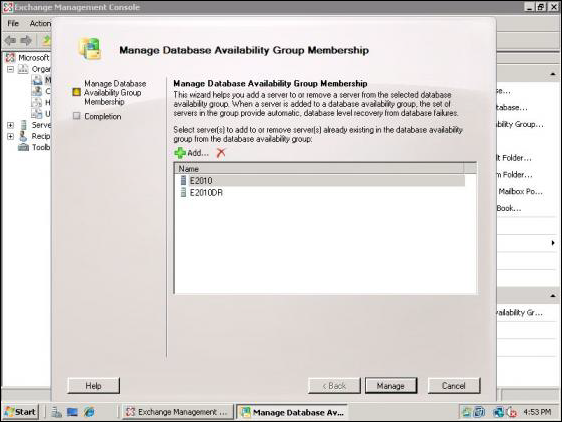
- Then, select Manage Database Availability Group Membership
- From the wizard, click on the ‘Add‘ button to choose the mailbox servers from a list to join DAG
- Then, click Manage for Exchange disaster recovery
- After the wizard completes, click Finish.
Step 3: Create Database Copies
- To begin, go to Exchange Management Console >> Organization Configuration >> Mailbox >> Database Management tab and right-click on the database to replicate
- Then, select ‘Add Mailbox Database Copy‘
- Next, Browse to the DAG server to save the database copy from the wizard that launches
- Then, select a replay lag time and a truncation lag time
- Next, type in a unique preferred list sequence number and click Add
- After the wizard completes, click Finish.
Conclusion
There is always a threat of failure due to Malware, Viruses, Trojan Horses, System Damage, Power Surges, System File Corruption, and more. This can only be resolved by putting the Microsoft Exchange Server Disaster Recovery Plan in mode. Avoid the loss of critical customer and customer data. There is a way to do this manually by creating a database availability group (DAG). There is also an automated way to recover data if all else fails. One of them is suggested in this post.