Exchange to Office 365 Migration Guide for IT Admins

Exchange to Office 365 Migration is one of the most common IT infrastructure remappings that administrators get appointed for. Which is why modernizing your Enterprise’s digital footprint should not be taken lightly.
Leaving behind an old on-premises system for a cloud-based system carries a lot of advantages. There is an obvious reduction in hardware investment, no more dedicated staff just to manage day-to-day activity, and no EOL security risks.
Office 365 is the right destination for organizations currently operating an outdated local Exchange system. It gives you 99.9% uptime SLAs while also eliminating a lot of overhead costs.
Moreover, you gain full access to the Microsoft 365 productivity suite, containing 40+ applications. In addition to that, you have the all-new Copilot, the AI tool. All of this is available in a predictable subscription model that you pay for per user.
Key Benefit: Organizations that migrate to O365 from Exchange report a 30-40% reduction in time spent on email infra management. All those work hours are better utilized elsewhere.
There is no one way to migrate. You can opt for different strategies as per your organization’s needs. Moreover, if you select the wrong process, it can erase all the efficiency gains you are hoping to get. So read carefully.
Exchange to Office 365 Migration Methods: Cutover, Staged, and Hybrid
As I told you earlier, there is no single path that takes you from Exchange to O365. The simple reason is that organizations are different, and their needs are different. Moreover, you can always mix and match the pathways when the situation demands it.
Cutover Migration: Recommended for SMEs with fewer than 150 mailboxes in total. In a Cutover type transfer, you move all mailboxes, contacts, calendars, and other user data in one shot. This is typically done over a weekend when user activity is minimum and the entire infrastructure can be dedicated to the migration process.
- Pros: Choose it if you want a simple setup with few technical overheads. It is the fastest type of transition and does not involve any coexistence period.
- Cons: All or nothing type of transfer. If something goes wrong midway, rolling back is complex. So, large organizations with thousands of users should avoid going through this pathway.
Staged Migration: Recommended for medium-sized enterprises moving from legacy environments (Exchange 2003 or 2007) with over 150 mailboxes. In a staged migration, you transfer user data in smaller, manageable batches over a period of weeks or months.
- Pros: Choose it if you want to mitigate the risks associated with a massive, single-weekend cutover. It allows your IT team to test and validate the migration in phases, ensuring uninterrupted business continuity for users whose mailboxes are still waiting to be moved.
- Cons: It is strictly limited to older, outdated Exchange versions (2003 and 2007). Furthermore, it requires the additional technical overhead of setting up Azure Active Directory synchronization, and users will be required to create new passwords once their mailboxes transition to the cloud.
Hybrid Migration: Recommended for large enterprises with thousands of mailboxes, or organizations that require strict compliance controls and a long-term coexistence period. In a Hybrid setup, you deeply integrate your modern on-premises Exchange servers (Exchange 2010 or newer) directly with your Office 365 tenant.
- Pros: Choose it if a flawless user experience is your absolute top priority. It provides a unified Global Address List, shared free/busy calendar information across both environments, and true zero-downtime cutovers. Users will generally not even notice their mailbox has changed locations.
- Cons: It is by far the most complex architecture to deploy, configure, and troubleshoot. It demands significant technical expertise, dedicated administrative resources, and often requires maintaining an on-premises Exchange server indefinitely just for management and routing purposes.
Perform the Exchange to Office 365 Migration Professionally
Recovery-Tools Office 365 Migration Tool is the most recommended utility for internal deployment of Exchange 2013, 2016, and 2019 to Microsoft Office 365. Its rich set of features eliminates complexity and simplifies the entire task. The free demo version of the software allows you to test all key functions for free with a complete guide.
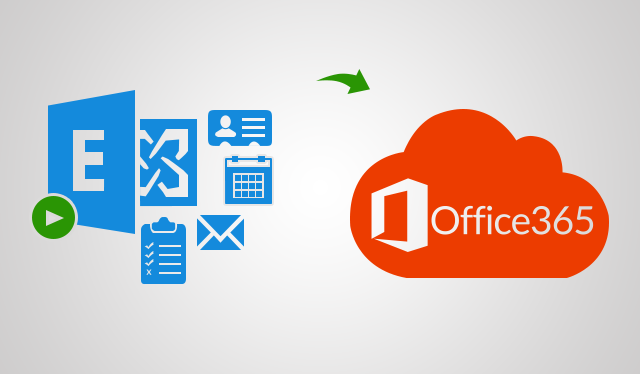
Exchange to Office 365 Migration Guide – Advanced Features
- Easily Migrate On-Premise Mailboxes into Microsoft Office 365
- Software Exports Emails, Contacts and Calendar from Exchange Server
- Concurrent Migration: Go Through Migration in Batches
- Selective Data Migration: Date Filter and Category Based Filter
- Re-Run Migration: Try Migrating Failed / Skipped Items Again
- Delta Migration: Transfer New Data Arrived in Source Mailbox
- Migrate Sub-Domain User Data Also Using this Utility
- Operating System: Windows 10, Windows Server 2012/2016
Download Now
Purchase Now
Exchange to Office 365 Migration Guide – Know Features in Detail
Get detailed features explanation of Exchange Server 2013, 2016, 2019 to Office 365 Migration Software:
1. Simple Export Process – The software is designed using advanced algorithms and allows users to export all emails, contacts, and calendars to their assigned accounts in just a few steps. With this utility, you can move all the data from your mailbox to the Microsoft Office 365 cloud without losing any data.
2. Quick Migration Task – With this SysTools Office 365 Migration Tool, you can speed up the whole process without any hassle. This allows users to transfer 20 users to Microsoft Office 365 mailboxes at a time. However, by adding multiple service accounts to the tool, users can increase the batch size of up to 200 mailboxes at a time. (Requires a highly configured machine with sufficient bandwidth)
3. Keep Folder Hierarchy Intact – The Exchange 2016, 2019 to Office 365 Migration Guide preserves the entire mailbox folder hierarchy throughout the process. That is, after the export process, the users will have the same folder structure in the destination mailbox. This software also maintains the integrity of the mailbox data.
4. No Mailbox Size Restriction – This advanced utility allows users to export Exchange mailboxes of any size. There is no mailbox size limit. This also allows users to forward large mailboxes from their O365 account.
5. Fetch or Import Users – This SysTools Office 365 Migration Tool has two options for adding users to your software.
- Fetch Users – This feature recovers all mailboxes created by Exchange Server with one click.
- Import Users – This option allows you to import a CSV file containing the user IDs of the mailbox sender and destination.
6. Migrate Data from Sub-Domain Users – This SysTools Office 365 Migration Tool consists of a number of great features. Another feature is that users can migrate data from mailboxes created in subdomains. This is an optional feature, so users can enable or disable it as needed.
7. Selective Data Migration – The software provides two filters. These are explained in detail below.
- Date-Filter: You can export data for a specific period of time.
- Category-Filter: This option allows users to forward only the mailbox items they need.
Also Read: Exchange Server Disaster Recovery Plan using DAG
Exchange to Office 365 Migration Guide – Working Steps of the Tool
Automated solutions make complex tasks easier and more efficient. Exchange 2013, 2016, 2019 Migration to Office 365 Accounts, This software makes the entire export operation much easier. The option to do the work in bulk actually speeds up the process.
1. Download and install this software on your Windows operating system and launch it

2. Select the Source and Destination options and apply filters as needed

3. Enter the correct Exchange Administrator Credentials, then enter your Office 365 Administrator ID
4. Finally, when all the validations are complete, press the Start Migration button.

Post Migration Tasks
Transporting the data is not the end of the migration ritual. There are quite a few post-migration activities that you need to complete so that a full transition takes place.
- Go and update all MX Records so that they now point correctly towards your Office 365 tenant.
- Verify the authenticity of SPF records to avoid email receiving failure.
- If you used third-party apps, make sure that they too now fetch data from O365 and not Exchange.
- Validate the Outlook Auto-discovery so that emails are fetched correctly
- Test connectivity on all user peripherals, like mobile, personal computer, and wherever else they might access their account
- Re-create the on-prem transport rules via the Exchange Online Admin Center.
Final Words
After receiving hundreds of inquiries from users, this article provided a detailed Exchange to Office 365 Migration Guide. Users can use this trusted third-party utility to export data seamlessly. This is simple and easy-to-use software that can ensure complete data migration without data loss.